Facebook Us

Showing posts with label valentine. Show all posts

Monday, February 13, 2012

Passion Pendants

This Valentine pendant decoration that I saw somewhere (but don't recall where) was really fun to make with the kids. It's pretty simple and versatile, make it as basic or complex as you like. Add more pendants,decorations or photos to it for personalization.

You need: Paper, scraps and embellishments, string and glue.
Start with A4 size paper ( or scrapbook paper made cut smaller). You can also use fabric or felt instead.

Fold in half and cut to create the point.

Decorate... these are Asher's handprints

Kaylee made hers with everything "Valentines"


Ahhh..I can't stop! More more!

Watch out for the bugaboo. He likes to grab things off the table.


Here I added a slip at the top to thread the fishing wire through.

Add caption


String it up and done!
"Love, like a river, will cut a new path
whenever it meets an obstacle."
Crystal Middlemas -

Love and hugs,
Kerry the Momster

Sunday, February 12, 2012

These, as our love, will last forever.

Nothing says love like handmade flowers.If you are like me, and despise roses, then whip up your own bunch of colorful carnations for Valentines Day. They are very, very easy. So easy, that I had time to write "easy" twice. :)

Start with tissue paper, folded in half until there is a stack. You can use multiple colors for the same flower, or single colors. These are yours, so there are no rules. (Well except that there is no crying in baseball, that rule applies everywhere)

Cut a stack into dog bone shapes. You can make a template or free-cut. It doesn't have to be perfect.


Using a pipe cleaner push up through the layers of paper. Then fan the "bones" around until they are evenly distributed. After that push the pipe cleaner back through the papers and wind around the base of the stem.

Pink Flower done :)
Smells good too! (No, not really)
Now, go make some!
Love and blooms,
Kerry, the Momster

Saturday, February 11, 2012

Soft as petals.

Felt flowers are fun!


A cute little felt flower tutorial, for your tiniest valentines. Easy-peasy, lemon squeezy, and so cute, you might become a felt flower addict.
Start with a square (I divided one piece of felt into 6 squares)
Draw a spiral. As you do more, you may not need to draw them anymore, and just cut blindly.
Cut some petals too, if you like.
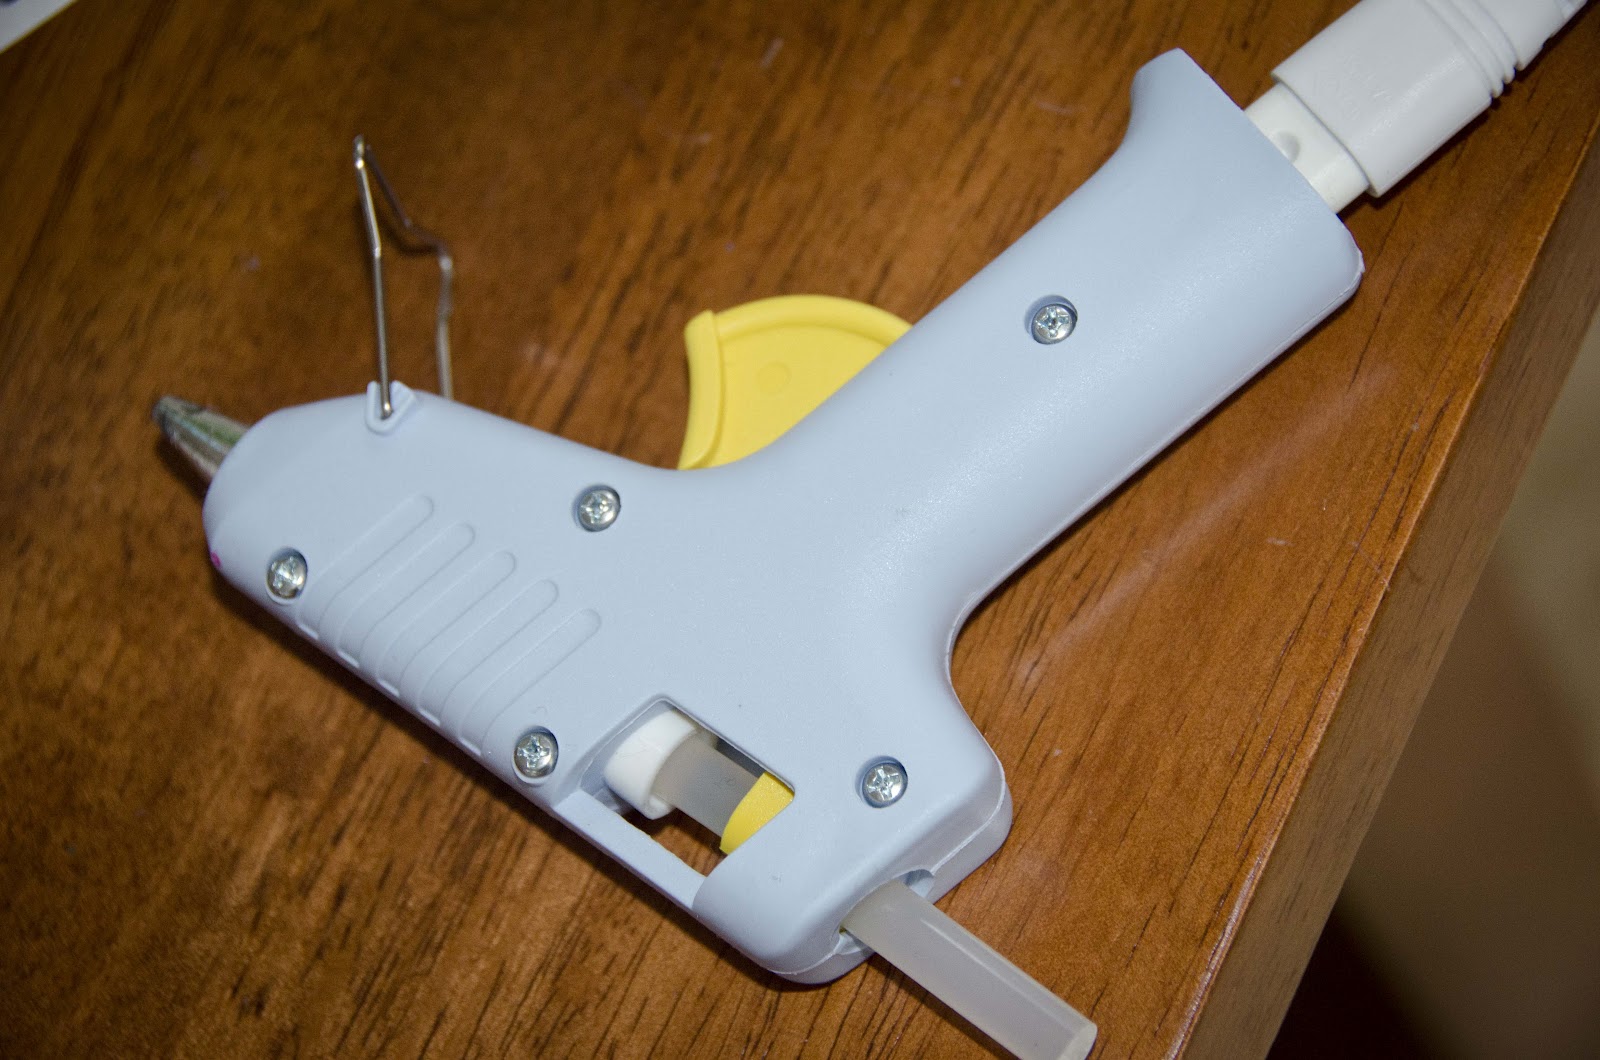
My favorite weapon in my craft box: glue gun! (but you can use liquid glue)
Cut the spiral...
Now roll and glue from the middle, round and round ( like rolling a sleeping bag)
More of the rolling...
When finished, glue the end. Now glue on some petals, and use to decorate your children. :) I glued a safety pin onto one, and a hair clip onto another. You can use them to embellish gifts, shoes, hairbands, tacoss... ok, maybe not tacos.

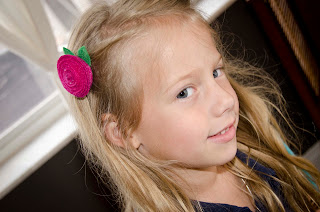
Pro Felt flower model.
Love and little flowers, Kerry the Momster

Friday, February 3, 2012

Little Red Tea Cart

Little Red Tea Cart Revamp: Weekend Project

This was a relatively effortless, affordable revamp to a tea cart for my kitchen- but would also make a charming addition to a hallway or bedroom if painted in a different color. 
  • How I did it: 
  • First I nailed down some loose boards on the bottom that were warped from water, then lightly sanded the wood and stains. Then I removed the wheels and painted with primer (extra primer on stained parts).
  • For color I used an indoor/outdoor lacquer spray paint as I was looking for a high-gloss effect. It took lots of layers and my fingers were sore!! I went through about 3 cans and had to wait between application.


    • But in one weekend the little cart went from drab to delectable and is now the "bread station" in our kitchen holding the toaster and vintage bread tin (another one of my favorite things). 


  • Love and charm,
    Kerry the Momster


  • Wednesday, February 1, 2012

    Fluttering Hearts

    Mine.
    Theirs
    I saw this lovely heart paper chandelier in the pottery barn kids' catalog with it's not-so-lovely price of $45. I figured it seemed easy enough to make so I had a go at it for about $3 and a little bit of time spent with my darling daughter. Okay, mine is not quite as fancy but it was my first try at it, and I made it fairly quickly. Still it does the job of adding heart flair, but I think I will make more and add ribbons and fun sparkly things too.
    Here's how...
    What you need:
    2 wire hangers
    old magazines
    fishing string or sewing thread
    scissors
    glue
    hole punch (optional)


    1. Start with 2 wire hangers. Twist them around each other to make a plus sign with one hook at the top. Bind the hangers with fishing string or wool. Next time I think I would cover it with ribbon before I tied the strings on to cover the wire.
    2. Tear red, pink and white colors from magazines (great for a child to do). You don't need the pages to be free of writing-as you can see I used Gerber ads here.
    3.Glue them into full "pages" so that both back and front are in valentine colors.
    4.Then cut out heart shapes, or use a template and have your child cut out hearts. You can also use construction paper if you don't want to go through the hassle of magazine scrap hunting.
    5. Punch holes into the hearts or just cut a little slit at the top.
    6. String the hearts together, tying double knots at the top of the heart to hold them in place. I used 3-5 per string. 


    7. Tie them on to the hanger 


    8. Hang :) 

    Love and fluttering hearts,
    Kerry the Momster