Facebook Us

Showing posts with label reduce. Show all posts

Thursday, February 16, 2012

Dapper Dude

DISCLAIMER!!! I'm really not a fantastic seamstress- never been schooled in the area or anything, but I do know how to thread my machine and run pieces through it so that they stay together-ish. That being said, I don't really measure, or cut straight or have patience, or any remnants of the OCD I thought I had (with 2 kids, I'm lucky if I have enough energy to brush my teeth everyday, so why waste it on measuring??)...so if you are a real "sew-er" you may want to opt out on viewing any of my sewing tutorials, as they may look somewhat to you, as what I imagine a lamb being slaughtered might look like to a vegetarian.

That being said, here is my remake of a baby jersey/sweater into a vest. I adore this little sweater, so was really bummed when Asher outgrew it. And so the old man sweater has now become the old man vest! Heres how:
Lay sweater flat.

Snip off sleeves, including the seam. Save sleeves for later as I think I may have another project in the works for those!


Pin the ends inside.
Sew down and ...

done!

Add a baby and you are good to go!

So cute, I know!

Next time I would overlap the sleeves a bit so that they aren't so gaping.


Love and cuteness, 
Kerry the Momster

Friday, February 3, 2012

Little Red Tea Cart

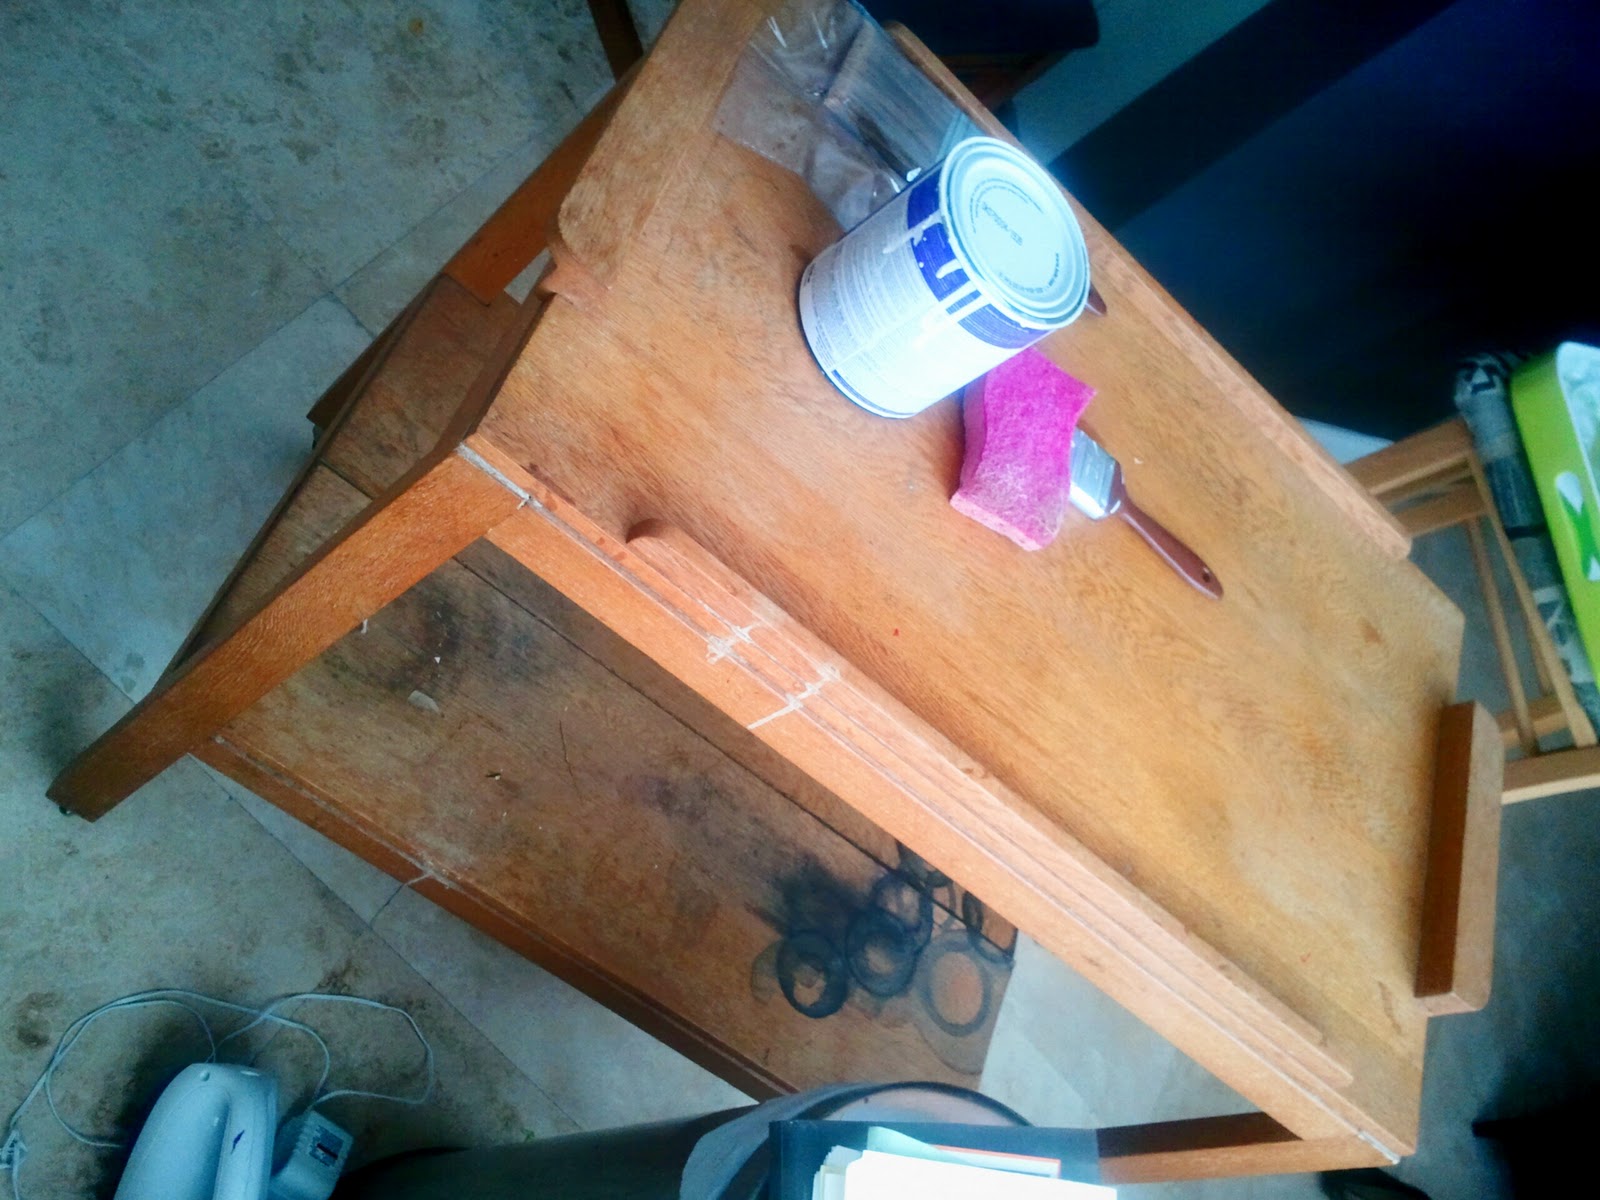
Little Red Tea Cart Revamp: Weekend Project

This was a relatively effortless, affordable revamp to a tea cart for my kitchen- but would also make a charming addition to a hallway or bedroom if painted in a different color. 
  • How I did it: 
  • First I nailed down some loose boards on the bottom that were warped from water, then lightly sanded the wood and stains. Then I removed the wheels and painted with primer (extra primer on stained parts).
  • For color I used an indoor/outdoor lacquer spray paint as I was looking for a high-gloss effect. It took lots of layers and my fingers were sore!! I went through about 3 cans and had to wait between application.


    • But in one weekend the little cart went from drab to delectable and is now the "bread station" in our kitchen holding the toaster and vintage bread tin (another one of my favorite things). 


  • Love and charm,
    Kerry the Momster


  • Wednesday, February 1, 2012

    Fluttering Hearts

    Mine.
    Theirs
    I saw this lovely heart paper chandelier in the pottery barn kids' catalog with it's not-so-lovely price of $45. I figured it seemed easy enough to make so I had a go at it for about $3 and a little bit of time spent with my darling daughter. Okay, mine is not quite as fancy but it was my first try at it, and I made it fairly quickly. Still it does the job of adding heart flair, but I think I will make more and add ribbons and fun sparkly things too.
    Here's how...
    What you need:
    2 wire hangers
    old magazines
    fishing string or sewing thread
    scissors
    glue
    hole punch (optional)


    1. Start with 2 wire hangers. Twist them around each other to make a plus sign with one hook at the top. Bind the hangers with fishing string or wool. Next time I think I would cover it with ribbon before I tied the strings on to cover the wire.
    2. Tear red, pink and white colors from magazines (great for a child to do). You don't need the pages to be free of writing-as you can see I used Gerber ads here.
    3.Glue them into full "pages" so that both back and front are in valentine colors.
    4.Then cut out heart shapes, or use a template and have your child cut out hearts. You can also use construction paper if you don't want to go through the hassle of magazine scrap hunting.
    5. Punch holes into the hearts or just cut a little slit at the top.
    6. String the hearts together, tying double knots at the top of the heart to hold them in place. I used 3-5 per string. 


    7. Tie them on to the hanger 


    8. Hang :) 

    Love and fluttering hearts,
    Kerry the Momster


    Friday, January 6, 2012

    After the After Party

    The last song has played, the last belly filled and the final guest stumbled out the door all aglow with cheer and wine. Now comes every hosts nightmare- the clean up! From my experience, it is always better to do the big stuff the night of, while you too are still toasty from the festivities. That way you wake up to a headache...BUT a relatively clean house. 

    After the party,the night of:
    • Give anyone left behind a trash bag and send them around to collect and toss trash.
    • Put bottles in recycle bin
    • Load the dishwasher and sweep. 
    • Tackle any spills now to avoid stains.
    • Even wash the floors if you have a lot of energy.

    Now in the daylight, after eating an egg sandwich (the amino acid in eggs supposedly helps break down toxins produced by the liver when ingesting alcohol) the morning after other items are much more doable. So what to do with all the leftovers and other party favors (problems) left behind?

    Left over club soda: if its flat use it to hydrate house plants. The phosphates promote growth (Real Simple Magazine, 2009).
    Dried out bread: Use as croutons in soups, or crush into breadcrumbs, add spice and store for future recipes that require breadcrumbs, such as casseroles.
    Too much cheese left over/or rock hard pieces: make it a cheese fondue dinner night
    Wine: If unopened- add to your wine rack of course, but if too many bottles are opened, freeze some into cubes to add to recipes later that call for wine, or make a syrupy boozy sauce to poor over pound cake.

    Love and celebrations,
    Kerry the Momster
    Tuesday, November 2, 2010

    With Thanks

    After my shower, I ran out of thank you cards (I know I'm blessed with so many people who love our baby). So I got out my craft supplies, surfed the web for inspiration, and came across these cute gems on a blog. Mine aren't as clean cut and beautiful as the originals, but they still turned out pretty well :)


    To make your own, here is the tutorial.

    Love and thanks,
    Kerry the Momster


    Tuesday, October 5, 2010

    Consumerism Crunch Time

    October is my "Buy Nothing Month" as an anti-consumerism movement. I have partaken in Adbusters Buy Nothing Day on black friday for the past 3 years, and I think I'm ready to take it a step further.
     Join me in my big, scary mission to buy nothing but the necessities for the month of October.
    You may buy food, toiletries and medicines and that's it. Get off the consumer tread wheel... we need nothing to be fulfilled. No one sat on their deathbed and said. "I really regret not having more stuff!" or "If only I had purchased that pair of shoes, my life would be complete right now."

    "That which you own, owns you!"

    My first 5 Steps to Anti-Consumerism

    1. Buy only items that are needed to sustain your life: food, toiletries, medicines.
    2. Utilize your library for videos and books.
    3. Try to abstain from magazines and television, as the media is used to perpetuate our spending habits, as we see what we "need" from season to season.
    4. Do a daily meditation in any form you see fit. Walk, exercise, breathe. It helps you connect to yourself and acts as a good reset button for your priorities.
    5. When you feel like shopping, go shopping in your closet. Pick pictures offline or from old magazines of outfits you like, and use the items you already own in new ways.
    More helpful reading:

    http://www.manhelper.com/money_career/how_to_stop_being_a_mindless_consumer

    And the website where I got my inspiration for this challenge:
    http://articles.moneycentral.msn.com/SavingandDebt/FindDealsOnline/CouldYouStopSpendingForAMonth.aspx

    Good Luck! Let me know how it goes if you choose to participate.

    Love and less stuff,
    Kerry, the Momster

    Friday, September 24, 2010

    Snack Packs

    Weekend Project idea:

    Here is me doing my part for the greenifying of the earth. Reusable snack packs, rather than countless ziploc bags daily for my daughter's lunch.
    This is fully lined in washable plastic, and made with a velcro closure. It may be used for dry or wet snacks- although not at the same time or there might be a squishy, inedible disaster where you left food.

    Here is a pattern if you would like to make your own, I just added a little fold over piece to mine.


    Or if you aren't particuarly crafty, save money on ziplocs by buying your snack bags. These ones are pretty cute. 
    $7.99 @Vitamin Shoppe

    Love and reduction,
    Kerry, the Momster